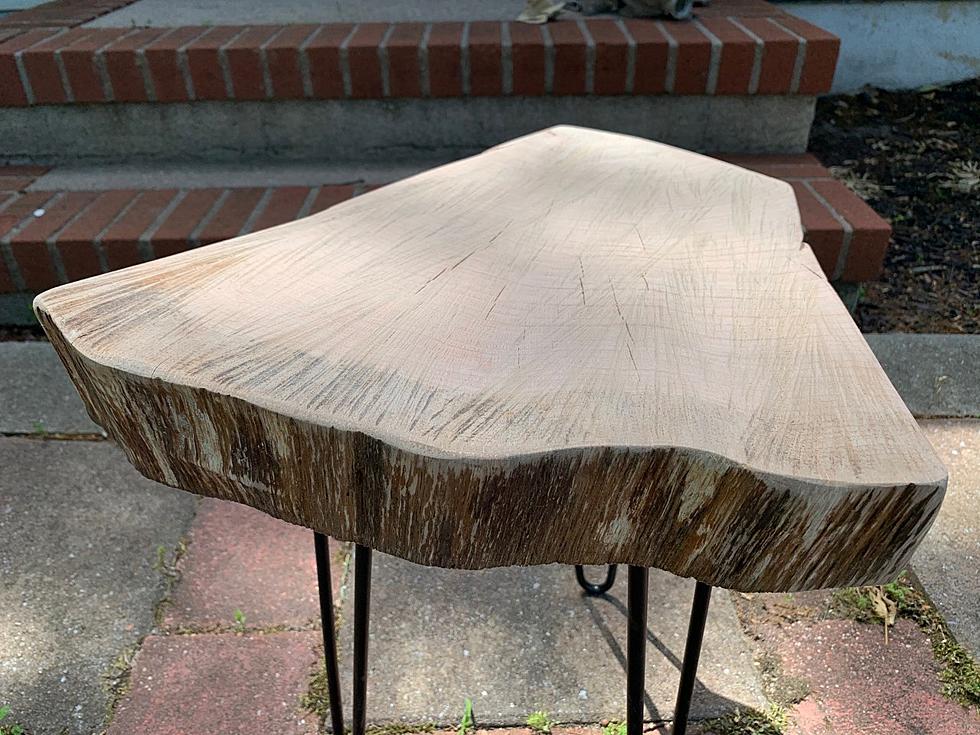
DIY Live Edge End Table [VIDEO]


What is a "Live Edge" table? a "live edge" table is one made from a tree slab which is cut from a tree with it's natural edge visible. As you can see above the section is cut to leave the original look of the tree on it's outer side.
In this case I am using a piece from a 100 year old oak tree that we had on our property for years, unfortunately the tree died....but we wanted to keep the memories of the tree and add to our style in the family room, which is kinda "woodsy". Emphasizing the outdoors. A modern farmhouse look if you will.


Step 1: I cut the slab to the size of the end table that I wanted, leaving one side the original outer part of the tree. Some prefer a round slab, I prefer a more rectangular piece. Totally your choice and depending on where you want the table may determine it's shape.
Step 2: Remove the bark, even though the tree will preserve, the bark can decay and eventually peel from the slab...so it's best to peel the bark and it gives the original edge a smooth and defined look.
Step 3: Sand the slab, removing all rough edge pieces along the back and sides of table and getting the front "live edge" smooth and defines. Also check slab for it's level and see if there is any adapting that's needed, I'll be honest I'm just doing this as a hobby so I'm not so worried about the perfect level...although those who do this professionally do. That being said I don't want a table that's on a slant
Step 4: Fill any cracks, I tried using a slab with very little cracking. I used wood putty. I let putty dry then re-sanded
Step 5: I flipped slab over and attached the legs. I used a metal leg....using three legs properly positioned to keep table level and balanced.
Step 6: One last sanding of the top and edges.
Step 7: Stain the slab. I used "early american" for a darker look. I gave the table several coats of stain. Make sure you have sanded the putty areas extra well or the putty will show through the stain.
Step 8: I applied a light coating of polyurethane to table top to seal and protect the finish.

KEEP READING: 50 activities to keep kids busy this summer
More From 92.7 WOBM